Many of us have, or will experience some form of immobility due to age or disability. As our population ages, more products are available to make bathrooms safe for seniors and those with disabilities.
Remodeling bathrooms for seniors and the elderly can provide independence and improved well being. Today we will discuss how installing a walk-in bathtub or senior safe shower is accomplished by the professionals.
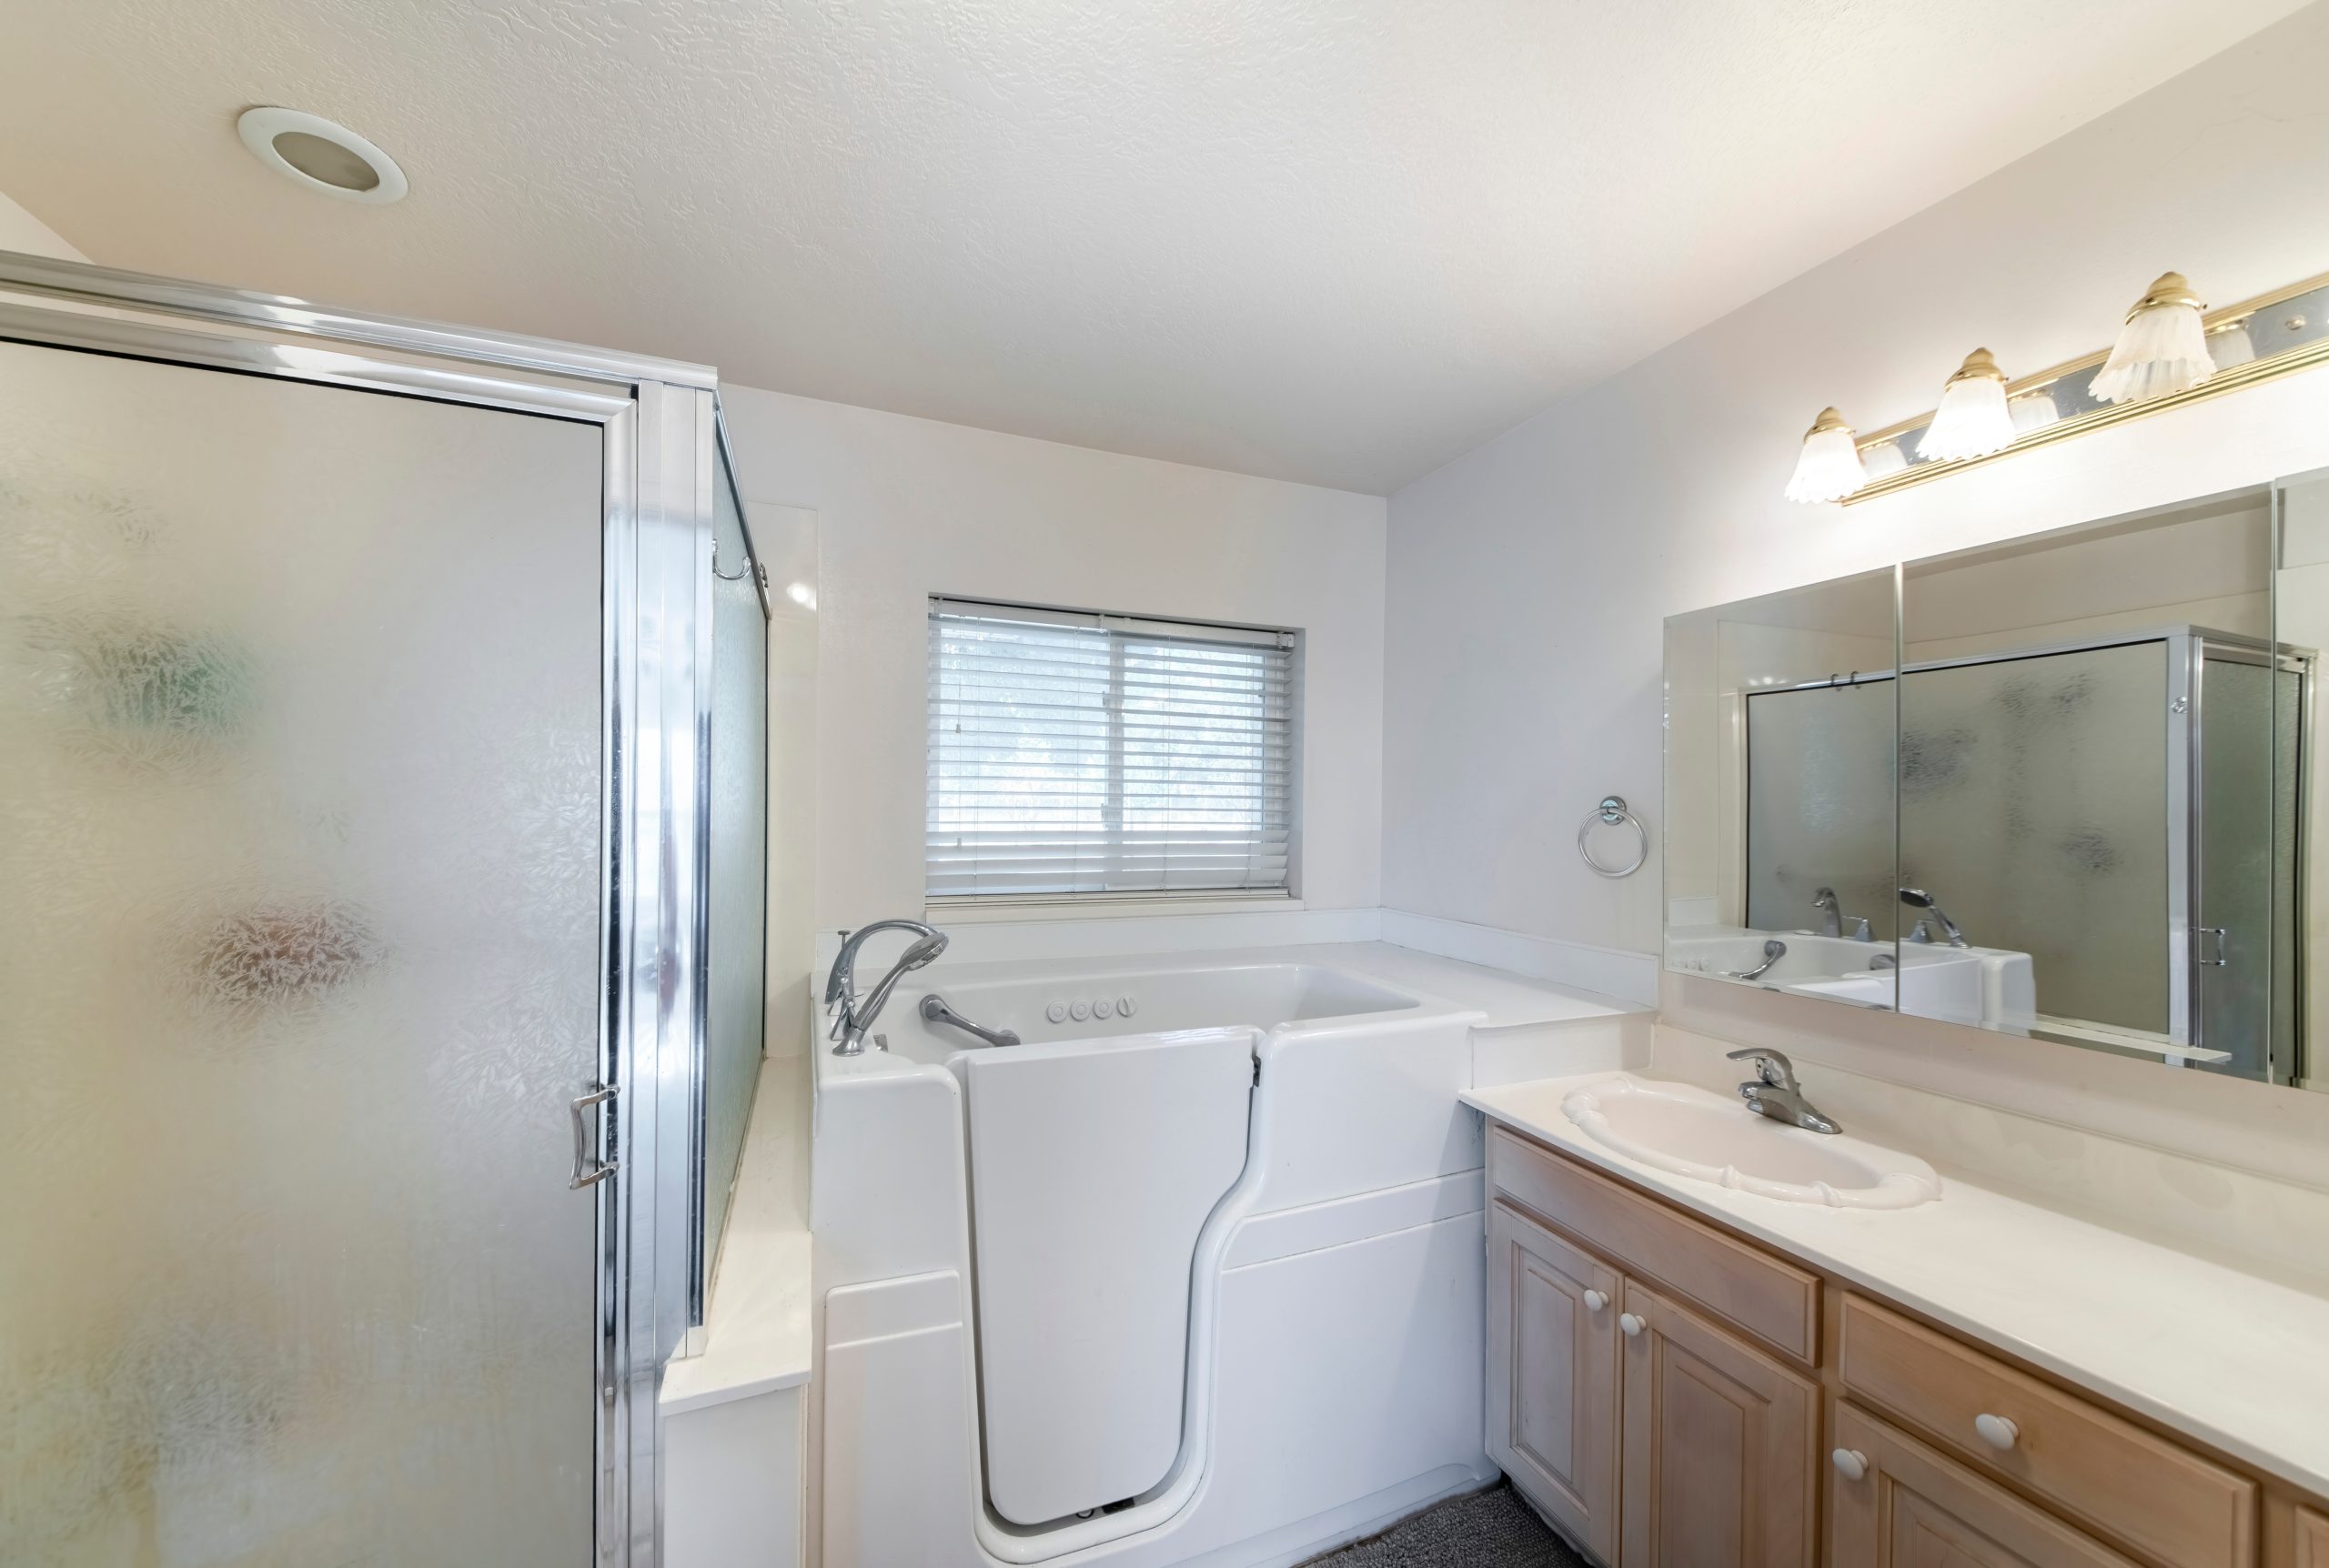
What Is a Walk-In Tub?
A walk-in tub unit is a bathtub that can be accessed without stepping over the edge of the tub. Some walk-in bathtubs have a short ramp and wide entrance, allowing someone in a wheelchair to access the tub easily without assistance.
Other walk-in bathtubs will have a self-sealing door that allows the tub to hold water for those looking to soak or take a jetted massage. Walk-in tubs and showers can make showers for the seniors and the elderly safe and simple.
How to Remove an Old Bathtub
The first step in replacing an old bathtub with a walk-in bathtub is to remove the old one. Removing a bathtub can be fairly simple or quite difficult, depending on the tub being removed.
Here we will discuss the common methods the pros use to remove an old tub/shower. We will assume that any plumbing and electric work has been completed, and we are just removing the tub.
Fiberglass Single or Multi-Piece Tub/Shower Unit
A fiberglass tub/shower combination bathtub can be a single unit, or a four piece unit that is assembled on site. Removing either of these units is relatively easy due to the malleable nature of the fiberglass. Most professionals will use a reciprocating saw with an 8” demolition blade and simply cut the unit into manageable pieces. Fiberglass tub/shower units are light and easy to handle.
Steel Bathtub
Steel bathtubs are not complicated to remove, as they are often simply attached to the floor with mortar or adhesive. Steel bathtubs are also light, so in most situations a steel bathtub can simply be lifted out in one piece. The drywall however, should overlap the lip of the tub so it may need to be cut away before the tub can be removed.
Cast Iron Bathtub
In most instances a cast iron bathtub is the most difficult to remove, so it is recommended to get some help before attempting it. The tried and true method of removing a cast iron bathtub requires breaking the tub with a sledgehammer. This technique is obviously dangerous, so the professionals will need to wear protective gear and drape the cast iron bathtub with a heavy blanket. The pros will then strike the tub through the blanket, which will prevent shards of porcelain from becoming airborne and causing injury.
Jetted Fiberglass Bathtub
Removing a jetted bathtub is also quite simple, but great care should be taken with the motor. Jetted bathtubs require electricity to operate, so there will be electrical wires on the end with the motor, which is usually the foot end. If the bathtub was installed according to the electrical building code, there will also be a GFCI (ground fault circuit interrupter) outlet within 3’ of the tub, so it must be disconnected. Once that is done, removal of the bathtub is the same as with a regular tub.
How to Install a Walk-in Bathtub
Installing a walk-in bathtub/shower combination is relatively simple if:
- The new unit is the same size as the old one
- The plumbing drain is in the same location
- The fixture is on the correct side
For our purposes today, we will assume these criteria have been met. If any of these situations is not present, you should consult a professional and correct them before installing the unit.
We will not discuss tile walk-in tub/shower projects today as the entire project will be custom built for the space. We will also assume that the walk-in tub is in a full sized bathroom, as half baths will not be large enough.
Step 1: Prepare the Pocket and Set the Tub
The first step is to prepare the space where the tub will be installed, known as the pocket. Following the manufacturer’s directions is critical because some barrier free, ADA-compliant bathroom walk-in tub/shower units will not fit the standard 60” wide pocket found in most homes. Be sure to select an appropriately sized unit to avoid moving walls.
The pocket should be checked to make sure it is square, plumb, and level before mounting the tub. Walk-in tub/shower units must be level and plumb to create the seals that prevent leaking. If the floor is uneven, most professionals will place small shims under the tub until it is perfectly plumb and level. Then, a bed of mortar or expanding spray foam is applied to the bottom of the tub and floor to permanently prevent movement. At this stage the walk-in tub/shower can be connected to the drain.
After the drain is installed and tested, the fixture and accessories can be installed. In a one piece walk-in tub/shower the hole for the fixture can be marked and cut with either a 4” hole saw, or rotary tool. If the project will reuse the old fixture, the valve location can be measured and transferred to the new tub for ease of cutting.
Optional Step 2: Add the Sections (If Needed)
Some walk-in tub/showers will need to be assembled on site. The majority of these units will have four pieces, which includes a tub, two end pieces, and a back wall, although some units may have five.
Multi-piece walk-in tub/shower units include a short lip along the top of the tub and wall sections that overlap to form a seal. Site built walk-in tub/shower units are usually attached directly to the stud wall because the drywall should overlap the nailing flange.
Most wall sections are installed with a combination of construction adhesive and #6 galvanized nails. Each section that attaches to the wall will have a mounting flange for the nails, which are driven through the flange and into the wall studs.
These mounting flanges will be covered by a drywall after the walk-in tub/shower unit has been installed. And as each wall section is installed onto the tub, a small bead of silicone is added to this lip to prevent water from contacting the wall behind the tub.
Step 3: Install the Fixture
At this point the walk-in tub/shower is mounted and ready for the fixture. Some walk-in tub/shower units will require a wall mounted fixture. Most tubs (jetted or standard) will require a tub filler, usually mounted to the top deck of the tub.
Wall mounted fixtures for tub/shower units will require a hole in the front wall for the valve and possibly another for the spigot, if the fixture uses one. Any optional accessories like a stool, moveable bench, or grab bars can now be installed per the manufacturer’s directions.
Step 4: Finishing Up the Caulk and Drywall
The last step in installing a walk-in tub/shower is to caulk and replace any drywall. Any drywall removed while removing the old tub can now be replaced and painted.
Most professionals will seal all around the tub/shower where it contacts the drywall or floor with clear 100% silicone. Doing so allows the wall to be painted with crisp lines, which will show through the clear silicone for visual effect.
Comments are closed